
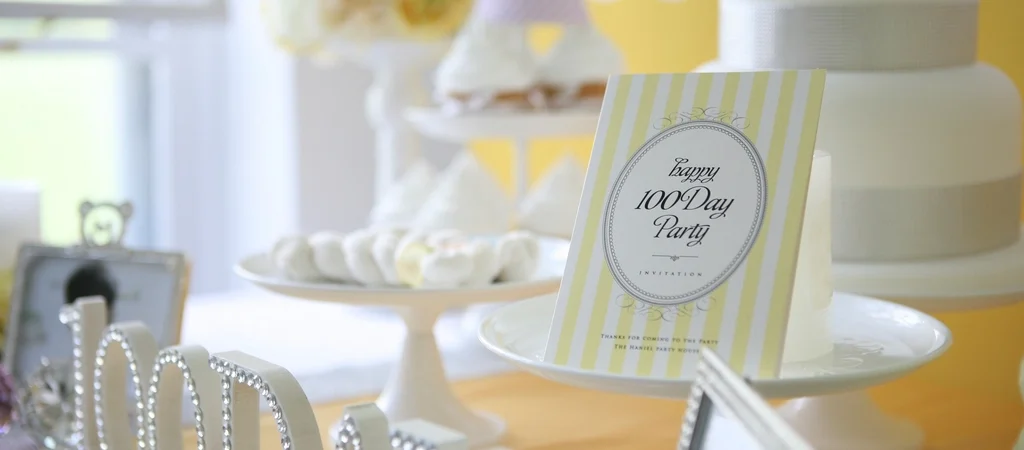
There is a moment in planning any party — a kid’s birthday, a baby shower, a milestone anniversary — when you price out custom invitations and quietly gasp. Printed cards from an online stationer can cost more than the cake, and that is before shipping and the two-week wait. The alternative sitting in your home office is better than most people realize: a modern inkjet printer, decent cardstock, and a well-designed printable template produce invitations your guests will assume came from a boutique print shop.
The gap between homemade-looking and professional-looking DIY invitations is not the printer — it is a handful of technique details nobody tells you: which paper to buy, which printer settings to change, and how to cut a straight edge. This guide covers all of it, from choosing a printable design to the moment the envelopes go in the mail.
Why Printables Beat Ordering (Most of the Time)
A printable invitation is a designed digital file — usually a PDF or JPG sized to a standard card dimension — that you download once and print as many times as you like. The advantages stack up quickly:
- Cost: one download plus cardstock covers twenty invitations for a fraction of a print-shop order — and reprints are free when the guest list grows.
- Speed: download tonight, print tonight, hand out tomorrow. No shipping window means invitations are never the bottleneck.
- Mistake insurance: spot a typo in the venue address after printing three? Fix and reprint for pennies. With ordered cards, a typo is a paid do-over.
- Flexibility: print five now for close family and fifteen more once the date firms up.
When is ordering still worth it? Very large runs (a 150-guest wedding), specialty finishes like foil or letterpress, and any time you simply do not want the project. For birthdays, showers, kids’ parties, and casual celebrations — the events that make up most of real life — printables win on every axis.
Paper: The Upgrade That Does 80% of the Work
If you change only one thing about your DIY process, change the paper. Regular printer paper at 80gsm reads as a flyer no matter how beautiful the design; invitation-weight cardstock reads as an event. Look for 200–300gsm (65–110lb) cardstock — thick enough to feel substantial, thin enough for most home printers to feed reliably. Check your printer’s manual for its maximum paper weight before buying a big pack, and always buy a small pack first to test.
Finish matters as much as weight. Matte cardstock is the safe all-rounder — colors print true, text stays crisp, and it takes handwriting well for addressing. Linen or textured stock adds a premium feel for showers and elegant events. Glossy suits photo-based invitations but shows fingerprints and can smear on some inkjets, so test before committing. Whatever you choose, let printed sheets dry for a few minutes before stacking — impatience is how smudges happen.
Printer Settings: Three Changes, Big Difference
Default print settings are built for text documents, not stationery. Before printing invitations, open the print dialog and change three things:
- Paper type: set it to “cardstock” or “heavy paper” so the printer feeds slowly and lays down ink correctly. This setting alone fixes most streaking and jamming.
- Quality: switch from Normal to Best or High. It uses marginally more ink and dramatically better rendering of colors and fine details.
- Scale: set to 100% or “actual size,” never “fit to page.” Fit-to-page silently resizes the design, throwing off margins and any crop marks.
Print one test copy on cheap paper first, hold it at arm’s length, and check the colors and margins. Screens display color in RGB and printers work in ink, so a design always shifts slightly in print — usually fine, occasionally worth a brightness tweak before running twenty sheets of good cardstock through.
Cutting and Finishing: Where DIY Lives or Dies
A gorgeous design with a wavy scissor-cut edge looks homemade in the wrong way. The fix costs little: a small guillotine or rotary paper trimmer cuts dead-straight edges and pays for itself across a few parties (it will also earn its keep on every other printable you ever cut). Cut with the printed side up, line the trim marks against the guide, and cut confidently — hesitation causes drift.
Most printable invitations come sized to standard dimensions like 5×7 inches, which means envelopes are an off-the-shelf purchase — an A7 envelope fits a 5×7 card. Buy envelopes at the same time as cardstock and get a few spares for addressing mistakes. For an extra finishing touch that costs almost nothing: a corner-rounder punch softens the look for kids’ parties, and a simple belly band of ribbon or paper elevates shower invitations to boutique territory.
Beyond the Invitation: Print the Whole Party
Once the printer is warmed up and the trimmer is out, the same session can produce the rest of the party’s paper: thank-you cards in a matching style, food labels, banners, favor tags, and games. Coordinated paper goods are the detail guests notice without knowing why, and printing them together means one design language across the whole event. Hosts who like a keepsake angle sometimes add a guest-book twist with pages from the gratitude journal printable — a “what we love about you” sheet guests fill in makes a lovely birthday or shower memento. Our printable cards, invites and party kits collection is organized around exactly this — full kits where the invitation, banner, and tags already match.
For bigger events, pair the invitations with proper tracking. If you are inviting more than a dozen households — a milestone birthday, a shower, or a wedding — the guest list and RSVP tracker keeps names, addresses, sent dates, and replies in one place, which beats reconstructing your invite list from a text-message archaeology dig. And party planners who host often keep their recurring event checklists in a home management binder, so every birthday starts from last year’s refined checklist instead of from zero.
Frequently Asked Questions
Can I print invitations without a home printer?
Yes — this is one of the best-kept secrets of printables. Copy shops, office-supply stores, and many pharmacies print PDFs on cardstock for a small per-page fee, and the output from their commercial machines often beats a home inkjet. Upload the file or bring it on a USB stick, ask for cardstock and actual-size printing, and you keep every other DIY advantage: the low cost, the instant timeline, and free fixes for typos.
What size should party invitations be?
The most common size is 5×7 inches, which pairs with widely available A7 envelopes and prints two-up on a standard Letter or A4 sheet. Smaller 4×6 invitations suit casual kids’ parties and fit A6 envelopes. Whatever the size, confirm the envelope pairing before printing the whole batch — the card-to-envelope match is the one detail that is annoying to fix afterward.
How far in advance should I send party invitations?
For casual parties and kids’ birthdays, two to three weeks ahead hits the sweet spot — early enough to plan around, close enough not to be forgotten. Showers and milestone events deserve four to six weeks, and anything requiring travel deserves more. One of the quiet perks of printing at home is that the invitation is never the reason you are late: you can go from download to mailbox in a single evening.
Your Next Party Starts at the Printer
Boutique-quality invitations are three decisions away: good cardstock, the right printer settings, and a straight cutting edge. Everything else is the design — and that part is already done for you. Browse invitation designs, matching party kits, and every other printable in the Pixquo shop; all are instant downloads sized for US Letter, with international paper guidance at printable planners by country. Pick a design tonight and your invitations can be in envelopes by the weekend.